What is Real Estate Photography?
As a professional real estate photographer, I often get asked what exactly my job entails. It’s easy to assume that real estate photography is just like any other type of photography – after all, it’s all about capturing images, right? However, the truth is that real estate photography is a specialized field that requires a unique set of skills and expertise. Unlike other types of photography, real estate photography is all about showcasing a property in the most attractive and appealing way possible, with the goal of getting potential buyers or renters interested in making a transaction. It’s not a job for everyone, and it takes time, energy, and dedication to master the craft.
Benefits of Real Estate Photography
There are two perspectives to consider – that of the seller or landlord, and that of the photographer. From a seller’s standpoint, professional real estate photography can help move their property quickly by increasing the foot traffic and exposure it receives. On the other hand, as a photographer, specializing in real estate photography can provide a steady stream of repeat business. Real estate photographers can establish long-term relationships with high-producing agents who sell multiple homes each month, ultimately resulting in an increase in business volume. However, not just anyone with a camera can succeed in real estate photography; it takes a dedication to producing professional-quality work to stand out in this competitive field.
What You Need
I believe that having the right equipment is crucial to producing high-quality images. While some people may think I go overboard with my gear, I can tell you that having a camera, tripod, possibly a flash, and a good quality lens is crucial for any real estate photographer.
Camera and Lenses
In my opinion, it’s the lens that really makes a difference. Currently, in 2023, I use a Sony a7iii for my real estate photography and have been using it since the camera first came out. However, what you really need is a DSLR camera that can shoot in a three-shot bracket or five-shot bracket. You can easily find this information with a quick Google search.
To avoid camera shake and get sharper images, it’s ideal to have a timer or remote for the three or five shot bracket, so you’re not constantly pressing the shutter release button. Additionally, it’s important to be able to change out the lenses, and if you’re using a crop sensor camera, make sure to multiply the crop sensor specifications by the lens you plan to use.
For example, a 1.5 crop sensor with a 16mm lens will give you an effective focal length of about 24mm. Ideally, you want a field of view between 15-17mm, so for a crop-sensor camera, you’ll want to shoot at around 10-12mm. With a full-frame sensor, you have more options like a 16mm or 35mm lens. You don’t need anything lower than an aperture of f4, so an f2.8 is not necessary. Unless you’re doing portraits or product photography, it’s best to go for the cheapest option or rent gear if needed.
Tripod
It’s important to have a sturdy tripod that won’t move easily. Manfrotto tripods are reliable, but they can be pricey at around $200 just for the tripod base. It’s also important to have a tripod head mount that can move in all directions. We prefer the Manfrotto ball head mount, which costs around $250, but some photographers suggest other options. Our tripod setup costs around $500, but it’s worth investing in high-quality equipment that will last.
Flash
I highly recommend using flash to neutralize the lighting in your shots. However, it’s important to note that flash photography can be challenging and it’s not recommended for beginners. If you’re just starting out, I suggest using a three or five shot bracket and finding an editor who can work with that style of editing. This will help you avoid frustration and achieve better & faster results from the beginning. Once you’ve mastered the basics, you can gradually introduce flash into your photography and take your skills to the next level.
Drone
If you’re considering taking your real estate photography to the next level in the shortest amount of time, investing in a drone could be a great option. However, before you can fly a drone commercially, you need to obtain a Part 107 license. My team and I used remotepilot101.com to complete our licensing education and take the test, which cost us around $500 in total. When it comes to choosing a drone, you don’t necessarily need anything too fancy – just something that can take pictures. We use the Mavic 2 Pro and Mavic Air 2s with twilight photography in mind due to their great sensor, but we primarily shoot in daytime. So, if you’re interested in adding drone photography to your services, it’s worth considering the initial investment in time and money for licensing and equipment.
Virtual Tours
I highly recommend the Ricoh Theta Z1 camera for virtual tours. It’s a fantastic camera and a must-have in your arsenal. If you’re looking to become a certified Zillow photographer, all you need to do is shoot five tours using the camera and submit them to Zillow. However, the certification requirements may have changed, so it’s always best to check with them. The camera itself can be quite expensive, costing around a thousand dollars, but it’s definitely worth the investment. With the Ricoh Theta Z1, you can provide your clients with stunning virtual tours that will set you apart from the competition.
If you’re planning to purchase a drone, a 360 camera, and a camera lens setup, you could end up spending around $5,000. To avoid breaking the bank, I recommend starting small and working your way up. You can rent equipment or start with a low-budget setup and upgrade as your business grows. By starting small, any additional investment you make in your business will be a valuable and worthwhile addition.
Real Estate Photography Tips
Lighting
At my business, we follow a systematic approach to shoot properties. For lighting, we use a five-shot bracket with a pop flash or multiple pop flashes, depending on the room’s size and lighting conditions. It’s crucial to neutralize lighting and expose the true colors of the property, and an editor specializing in real estate photography can help with that. It’s important to do some quality assurance to ensure that the photos meet your standards and push back if necessary. I recommend specifying what needs to look better so that you can deliver high-quality photos to your client.
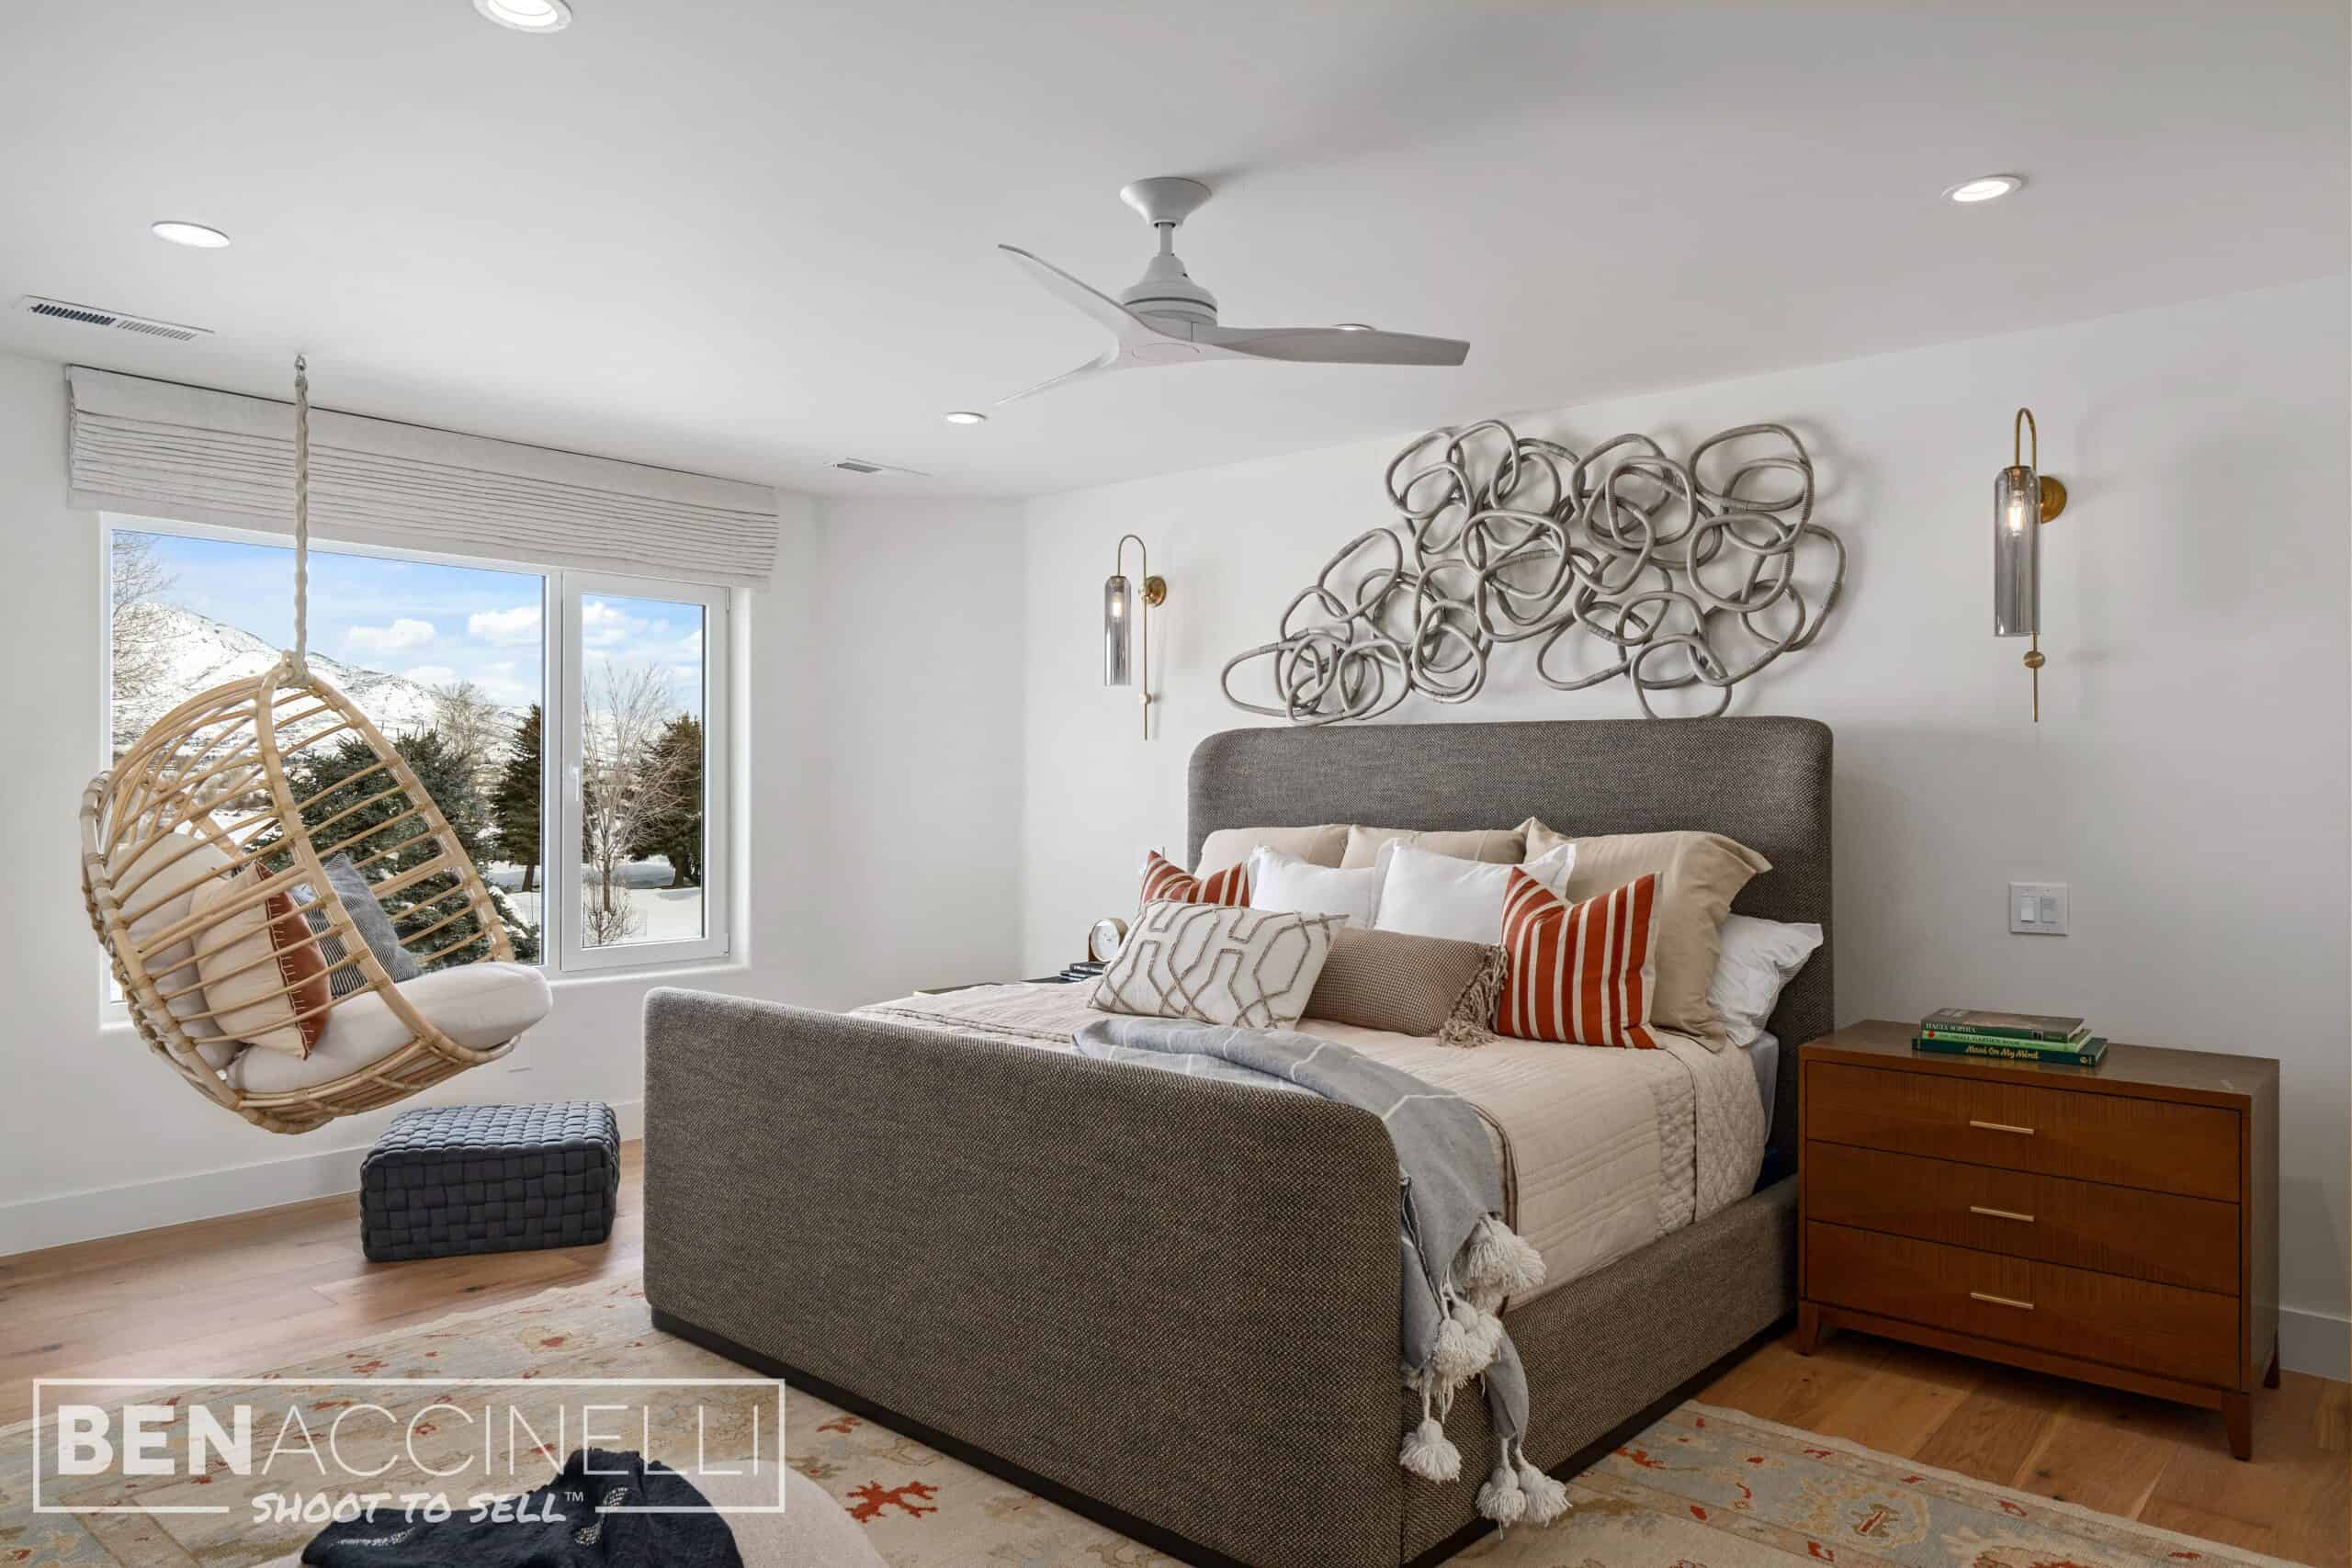
Angles
Our general rule of thumb for angles is shooting at light switch height and capturing a third wall in each shot. This is important to give the viewer a better understanding of the space and what it feels like. Because if you only get two walls, it may look like an infinite room. Whereas if you get three walls in your photo, psychologically that’s fulfilled. We compose our shots to tell the story on the sides, with slivers of doors, walls, cabinets, or beds connecting to subsequent images. And so the middle is where the space is sold. The size is where the story is told.
With Third Wall vs Two Walls
Look closely on the images and notice how a sliver of the wall on the edges can be seen and makes you think that the room is fulfilled.


Conclusion
In conclusion, real estate photography is a specialized field that requires a unique set of skills and expertise. It’s all about showcasing a property in the most attractive and appealing way possible, with the goal of getting potential buyers or renters interested in making a transaction. For a successful career in real estate photography, having the right equipment is crucial. Starting small and working your way up to more expensive equipment is recommended to avoid breaking the bank. Becoming a successful real estate photographer takes time, energy, and dedication to producing professional-quality work, but the rewards of establishing long-term relationships with high-producing agents and increasing business volume can be worth it.