The Only Video Gear You Need
I’ve started creating YouTube videos and marketing videos with high-end equipment and that was a huge mistake. Here are some things every beginner absolutely needs to get started in creating video content.
The only equipment you need to get started in creating video content is a cellphone that can film in 1080p or greater. Optional gear would be a tripod, an external audio recorder, and a light kit. If you’re wanting more professional gear, you’ll want to invest in a DSLR camera and a good lens kit.
Start small because you might not like video production
Whether you’re filming for yourself, your business, or for fun, you’ll want to start small. The best camera to shoot with is the one you have—in this case, your smartphone. Most smart phones these days, including my iPhone SE and Galaxy S7, can shoot in 1080p or greater. Both of which are outdated technology.
As long as you have a decent resolution, you can start filming immediately.
If you need to film a talking head, you can shoot on either your phone at arms distance or on your laptop—because, again, today’s technology is good enough for creating great content.
The key component to great content is story and sound. Without a good story to share, you don’t have anything worth working for.
If you don’t have decent sound, your message won’t go anywhere—rendering it useless and wasted effort.
Basic equipment needed to start a YouTube channel

Camera
When it comes down to film gear—especially when it comes to educational content—camera gear can be done with what you already have—your smartphone.
As mentioned before, your message through the delivery of sound or audio will be the main technical aspects you’ll have to prioritize.
Using a cell phone or webcam is more than sufficient, especially now that most of the world consumes video content through a mobile device.
Cell phones and webcams can easily shoot in 1080 resolution which is the resolution of most television sets in people’s homes.
However, even with a 50 inch television set, social media video content will rarely be watched unless it’s on a smartphone or tablet.
Don’t get hung up on video gear unless your content is meant to be watched in 4k or 5k.
I’ve worked with a respectable youtuber with over 10 million subscribers and a simple Sony camera shooting entertainment content produced more than six figures monthly for him—and we were shooting in 1080 resolution.
If you’re looking for a reason to upgrade, my advice would be a DSLR with good autofocus and a port for external sound.
If you had to move away from a cell phone or webcam, the main objective you want to achieve is by using a camera that has semi-professional qualities that can be set to auto.
As soon as you’re spending more than an hour trying to figure out how to use your gear, you’re already procrastinating and too lost to create any content—don’t waste your time on the technicalities of shooting your video.
When in doubt, use your phone and start filming.
Audio
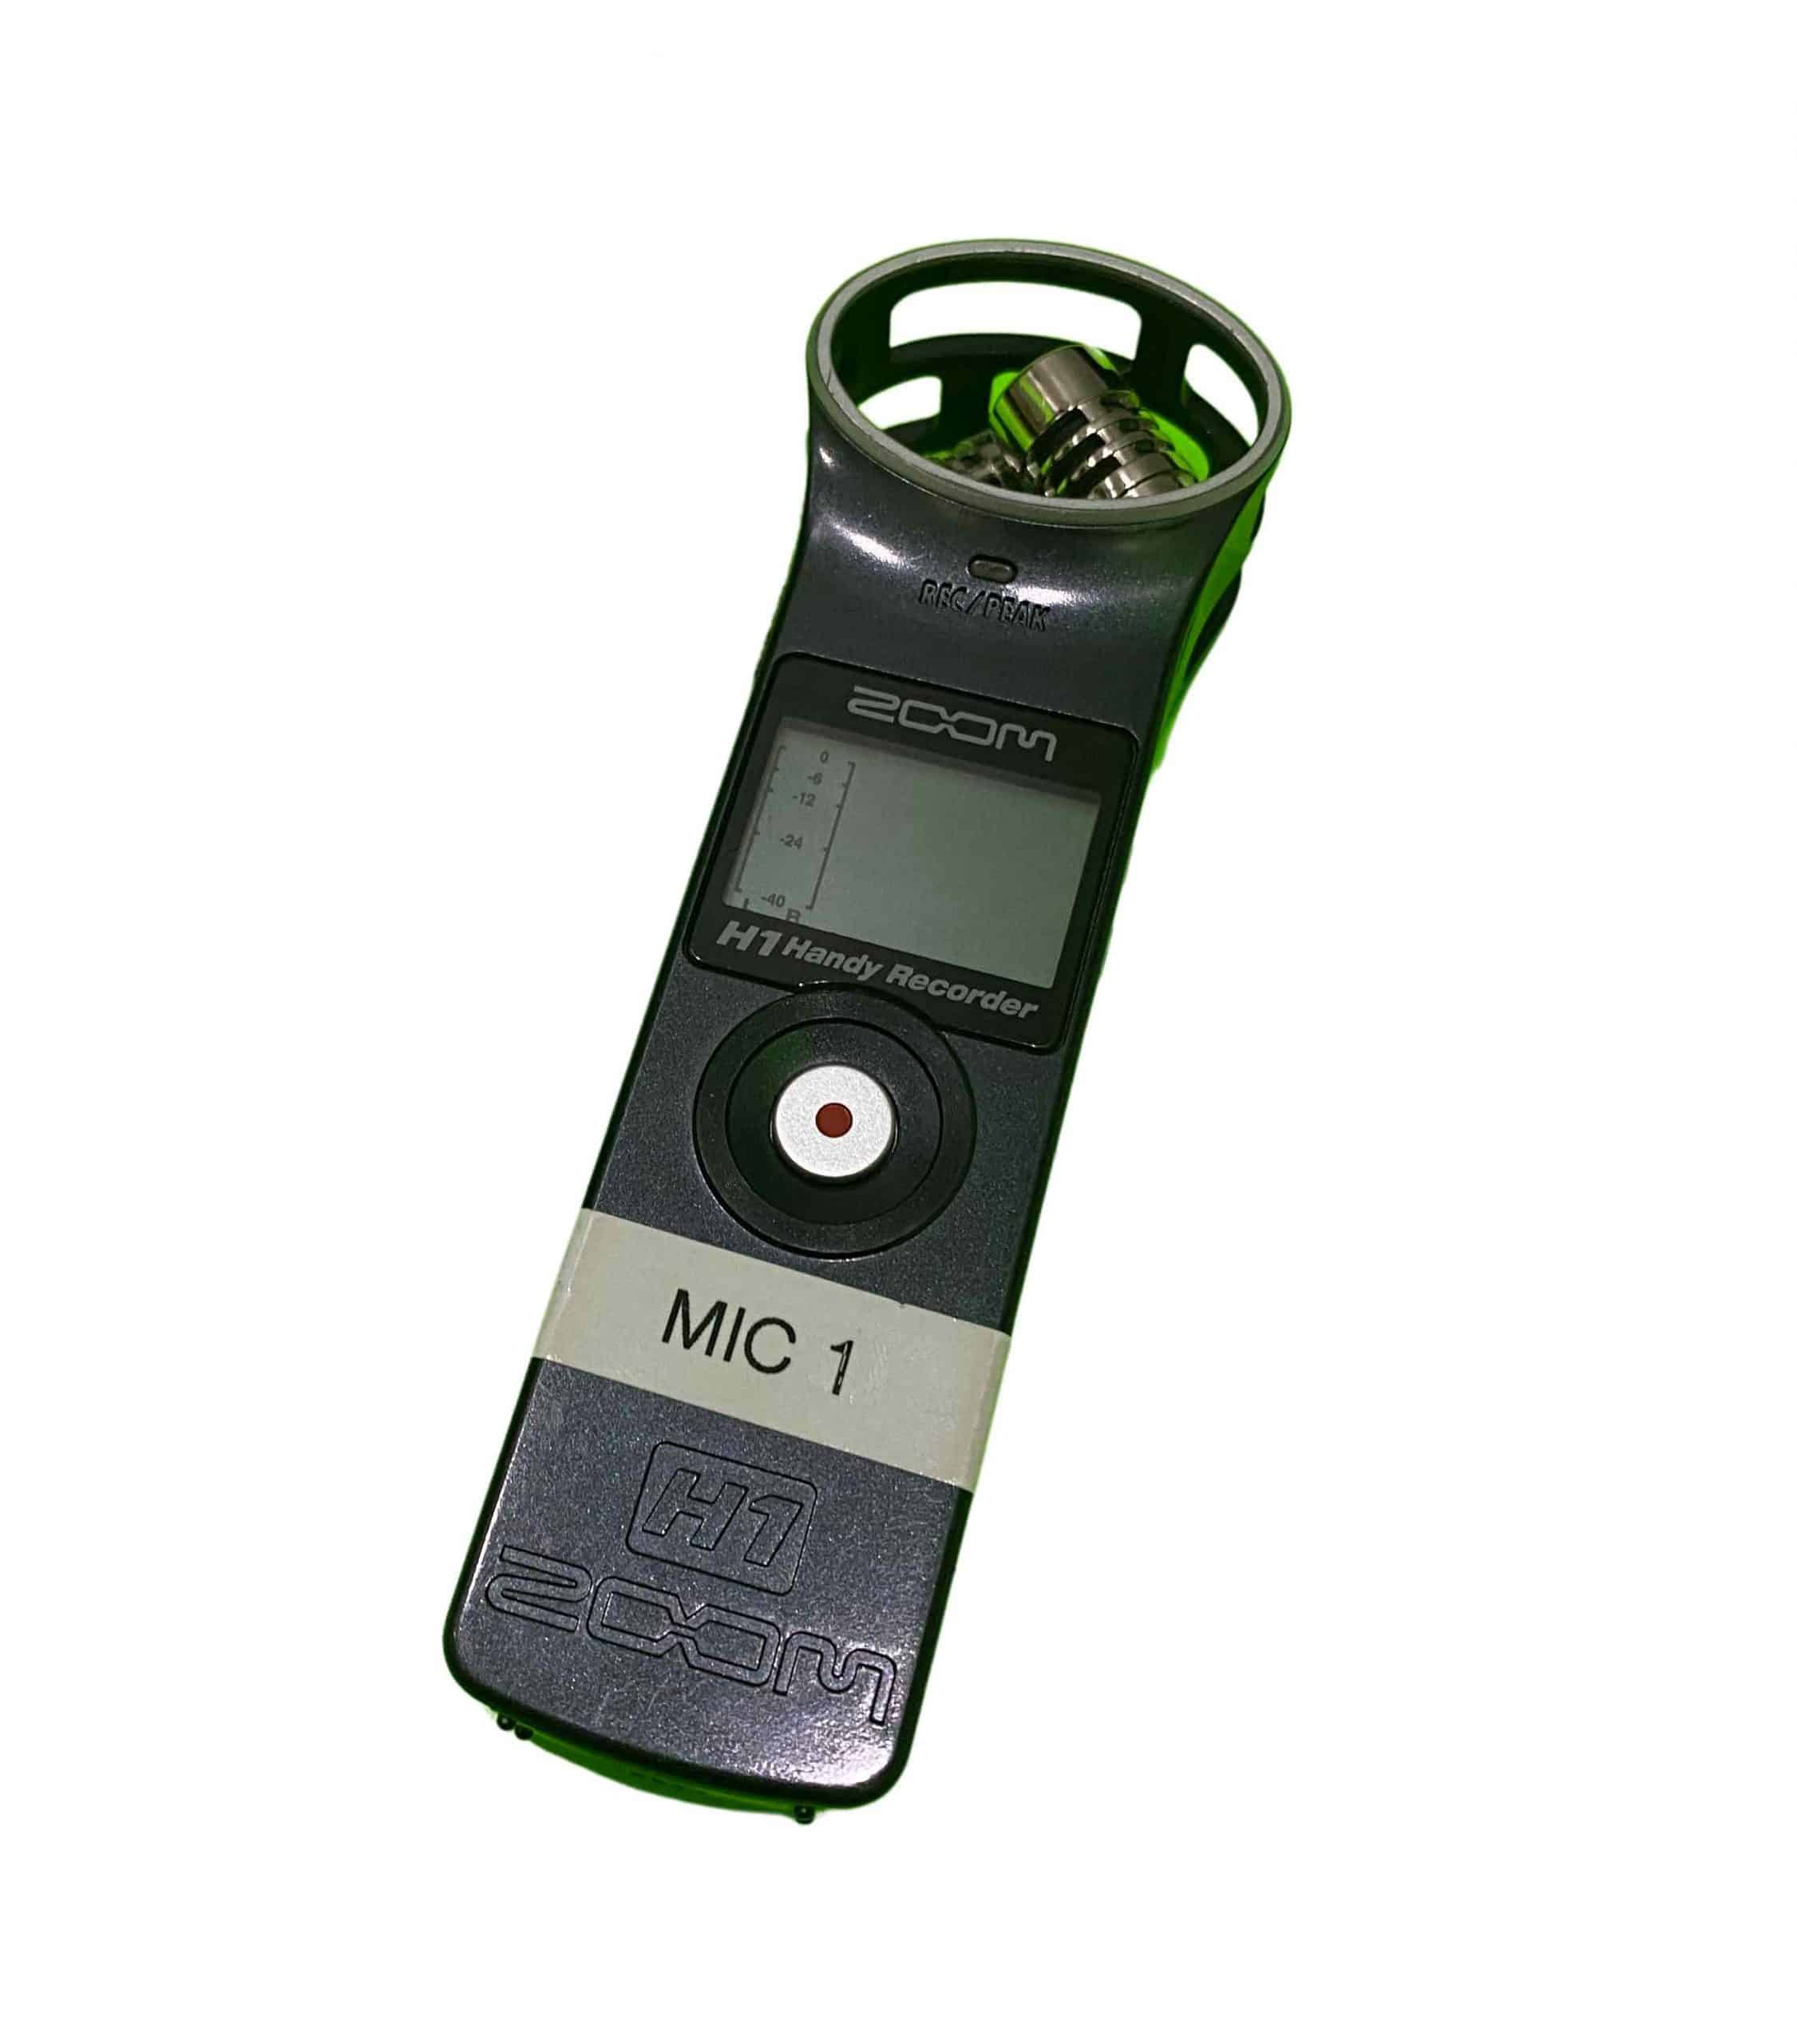
Audio is the most important gear you’ll need to invest in that will take your video to new heights.
I use the Zoom H1n ($100) with a Sony lapel ECM-CS3 mic ($20) and it’s the best audio combo I’ve ever used.
I’ve made my own six figures using this device on just about every shoot. If I didn’t use it, more than likely there wouldn’t be any dialogue.
This audio setup captures the richest sound for less than $150 and produces consistent sound every time.
I have bought a $600+ Sennheiser wireless mic and it was one of the worst purchases I made.
To replace the cable of the lapel would cost over $100 when you can buy a Sony ECM-CS3 for $20 at your local Best Buy.
Because it’s wireless, it’s sensitive to other frequencies and I’ve had unrepairable moments with my Sennheiser in having static sounds appear in my videos.
Start small, get what you need, but nothing more unless it will save you time and where you can see a clear return on your investment.
Lighting
I’ve never spent too much time on lighting and still own and use the lighting I purchased six years ago.
What’s most popular are the ring LED lights, and rightfully so. These lights don’t burn hot, they’re super compact, and they cost less than what I paid for my lights from B&H.
Most local Best Buys will carry ring lighting or you can check on Amazon for what the best sellers are.
The objective with lighting is to produce clearer video than what you already have. Lighting can better separate you from the background and allow the viewer to focus more on you as the visual subject of the video.
Anything that distracts the attention of the viewer away from you, visually, can mostly be mitigated through proper lighting.
Editing Software
What editing software do I need for YouTube videos?
Editing software can range from free to $300+ depending on your workflow.
You really won’t know what you need until you’ve edited a few videos and understand the process of video production for you as an individual person.
It comes down to finding the right tool that can cut your footage, move around your clips, and export into a video file very easily.
Once you understand the basic principles of video editing, you can either invest in software to make your workflow more efficient or know how to train a video editor to edit in your style or better.
Below are a few popular video editing tools that I’ve personally used as well as other professionals in the industry.
Final Cut Pro
The price for this editing software is $300 and used only on Macs. This is a very powerful tool as a stand alone software for video editing and if you need something ready to go out of the box with ready-to-go presets and effects, Final Cut Pro should be your go-to.
The reason I stopped using it was because of its file management and how confusing it was.
Another reason is also because I use graphics and animation in my videos that the workflow in creating additional assets became cumbersome.
It is for sure considered a professional software and many professionals do use it, but you’ll want to watch a few tutorials first before you start using it specifically when it comes to file structure and keyboard shortcuts.
Adobe Premiere
![]()
Adobe Premiere can cost anywhere from $20 as a stand-alone product to ~$50 monthly for the Adobe Creative Cloud Suite.
A lot of editors, teams, and production companies use the Adobe suite because you can collaborate on multiple files simultaneously while building a video.
For example, if I were to create a graphic that I wanted to animate for a video, I could create that graphic in photoshop, bring it into after effects to animate, then bring it into the premiere to add to my video.
If I had to change the color or modify the graphic, I could do so right in photoshop and have it update straight into the premiere without having to do anything else. The updates between the software’s, or in other words, the way the Adobe Suite dynamically links to each other is very efficient for my specific workflow and makes it easier to work with my team.
I started out with Final Cut Pro before making the switch because I began working with a team and collaborating was a lot easier.
My struggle was changing my habits from Final Cut to Adobe Premiere’s setup.
I watched about eight hours of Lynda.com tutorials before knowing what to do in Premiere, but lucky for you, I made a quick and easy Premiere training that I gave to my editors that you can reference and get to editing in less than an hour.
Download Adobe Creative Cloud for free and I’ll send you the video training.
iMovie
Comes standard in any Apple computer and it’s compared to be the watered down version of Final Cut Pro.
The only reason you would want to upgrade to Final Cut or Premiere would be to add color correction, make adding music easier, add special motion graphics & effects, or
Both are Apple products, but as mentioned before, all you really need is a tool that will cut clips, move around your footage, and export your final product.